Choose a Brisket Cooking Method
The best way to cook beef brisket depends on the equipment you have and whether you prefer a softer, moist result or a smoky flavor with a firmer exterior. Oven cooking and covered-vessel methods limit direct exposure to dry heat, while smoking relies on indirect heat and adds smoke flavor. Each approach can produce tender brisket, but they differ in how closely you need to attend to the cook. Beef Cooking Guide is an independent English information guide, not a seller or service provider. Compare the methods by their setup and the texture they are designed to deliver.
Oven or covered cooking
Oven-baked brisket and covered-vessel cooking use contained equipment to surround the meat with steady heat. The comparison below focuses on the setup and the kind of texture each approach tends to produce.
| Approach | Equipment and heat style | Moisture and attention | Intended texture |
|---|---|---|---|
| Oven roasting, covered | Roasting pan with a tight lid or foil; indirect, surrounding oven heat, commonly around 250–325°F. | The cover limits moisture loss; occasional checks are usually enough to confirm the cooking environment remains steady. | Soft, moist meat with less pronounced exterior browning than an uncovered cook. |
| Stovetop braise | Heavy Dutch oven on a burner; gentle heat from below, with liquid and a fitted lid. | The covered pot retains vapor, but the burner may need adjustment to keep the liquid at a gentle simmer. | Moist, tender meat with a braised character and a softer outside. |
| Slow cooker | Electric slow cooker on its LOW or HIGH setting; enclosed, indirect heating from the vessel. | The lid stays in place and requires little active attention once cooking begins. | Very soft brisket with a moist, pot-roast-like texture rather than a dry exterior. |
These methods do not create the same surface as an exposed smoker: a lid traps steam, so the outside generally stays softer. The oven offers flexible pan size and broad heat control, while a Dutch oven or slow cooker keeps the cooking space enclosed. Choose a slow cooker brisket when minimal hands-on attention and a soft, moist result matter most; use the oven when you want a familiar setup and more control over the surrounding heat.
Smoking or other low-heat methods
Smoking cooks brisket with indirect heat inside a dedicated smoker or a covered grill arranged for indirect cooking. The meat sits away from the direct flame, and wood smoke passes through the cooking chamber, adding a flavor that an oven or covered pot cannot reproduce. A pellet smoker automates fuel delivery; a charcoal kettle requires more attention to its fire and airflow. Both can expose the brisket to smoke while keeping the main heat source separate from the meat. Smoke exposure varies with the fuel, airflow, and how long the brisket remains in the smoky cooking environment. A wood-fired smoker gives the cook direct control over fuel and smoke, while a pellet unit feeds pellets automatically and generally needs less fire tending. Indirect grilling can use charcoal or gas, but the cook must preserve a cool zone beneath the brisket and keep the lid closed enough to maintain steady heat. These are low and steady approaches, not fast direct grilling. Unlike covered braising, an open smoker does not surround the brisket with trapped cooking vapor. Some smokers include a water pan, and the cook can use a pan or wrap as a moisture-management choice; these additions do not make the exterior identical to meat cooked under a lid. The exposed surface can develop a firmer bark, and wood smoke gives smoked beef brisket its characteristic savory, smoky profile. A smoker also asks for more attention to fuel, airflow, and chamber conditions than a slow cooker, even though it avoids constant direct handling of the meat. Choose smoking when smoke flavor and a more defined exterior are priorities, and you can monitor the fire or equipment during a long cook. If you value a low-attention routine and a softer, moist texture more than bark and smoke, a covered oven or slow cooker is the more practical choice.
Prepare the Brisket
A well-prepared brisket has enough surface fat to protect the meat, but not so much that it blocks seasoning or pools in the cooking vessel. Trimming also gives the cut a more even shape, which helps it sit securely in an oven pan or on a smoker grate. Seasoning should cover the exposed surfaces rather than collect in patches. Before you cook, make sure your equipment can hold the brisket without crowding it.
Trim and season
Trim excess surface fat to reduce thick, waxy patches and expose more meat to the seasoning. Leave a thin, even layer where you prefer some fat protection; trim preferences vary by cook and cut.
Work with a cold brisket and a sharp boning knife, using short cuts that follow the meat rather than digging into it.
- Remove hard, thick lumps of exterior fat that sit well above the surface; they are less likely to render evenly than a thin, smooth layer.
- Keep the fat cap even instead of stripping it bare; many cooks leave roughly a quarter inch, while personal trimming preferences can differ.
- Cut away dangling flaps and narrow edges that may burn or fold underneath, but avoid reshaping the flat into a much thinner piece.
- Check both sides and the edges for dense knobs, then turn the brisket to confirm it lies flat without excess fat holding it up.
- Apply salt and any chosen dry spices across the top, bottom, and sides; use a coarse grind if you want the seasoning to remain distinct.
- Distribute the seasoning by hand in a light, even layer, including the thinner edges, rather than piling it into creases or bare patches.
Press the seasoning gently so it adheres to the surface, then leave the brisket uncovered in the refrigerator for at least 30 minutes or until the coating looks settled. If you season ahead, keep the meat refrigerated and covered; an overnight hold lets salt distribute more thoroughly.
Set up the cooking environment
Choose equipment that supports the brisket without forcing it to bend or touch the sides. A whole packer brisket often needs a roasting pan around 16 by 12 inches or a large smoker grate; measure your cut and equipment before seasoning.
For an oven, use a sturdy roasting pan or Dutch oven with enough clearance to place and remove the brisket easily. A rack can lift the meat above collected drippings when the recipe calls for it, while a snug-fitting vessel is useful when the chosen preparation requires a covered cook. Leave room for a lid or foil without pressing it against the meat.
In a smoker, arrange the brisket on a clean grate with space around its edges so smoke and heat can circulate. Check that the lid closes fully and that the grate is level; a brisket that overhangs can obstruct the lid or sit unevenly. Position a drip pan beneath the meat if you want to catch rendered fat and simplify cleanup, but keep it clear of vents and airflow paths.
If the recipe includes broth, water, or another cooking liquid, measure it before adding it to an oven vessel so the pan remains manageable when full. For a smoker, use a separate drip pan rather than placing a deep container where it blocks circulation. Set out tongs, heatproof gloves, and a stable landing surface before loading the brisket. A pan or grate with a little clearance and an unobstructed lid makes the setup practical for either appliance.
Cook Slowly and Manage Moisture
Brisket benefits from controlled, relatively gentle heat: gradual cooking gives its connective tissue time to soften without subjecting the meat to sharp temperature swings. Whether you use an oven, smoker, or slow cooker, consistency is more useful than frequent adjustments. Covering or wrapping changes how much moisture stays around the brisket and how much airflow reaches its surface. Choose based on the exterior you want as well as the level of attention you can give the cook. Small, deliberate adjustments help preserve that balance.
Maintain steady heat
Gentle, steady heat gives the tough connective tissue in brisket time to soften as the meat cooks. Large swings can make the cooking environment less predictable, so monitor conditions rather than repeatedly changing the heat.
- Check the cooker’s heat with its built-in gauge or a separate oven or grill thermometer, and look for a steady reading rather than brief fluctuations.
- Keep the brisket in a consistent position; moving it between hotter and cooler zones can create uneven exposure across the flat and point.
- Limit lid opening to necessary checks, since each opening releases heat and can disrupt the cooker’s stable environment.
- For a smoker, watch fuel and airflow so a fading fire or sudden surge does not produce a major change in heat.
- In an oven, avoid placing the pan directly beside an active heating element, where localized heat can be stronger than the surrounding air.
- Make one adjustment at a time when readings drift, then allow the cooker to respond before changing vents, burner settings, or fuel again.
These habits support low and slow brisket cooking without relying on constant intervention. Pay attention to the cooker’s reading and placement; repeated lid checks and rapid corrections work against steady heat.
Choose whether to cover or wrap
Covering limits airflow around the brisket, while wrapping encloses the meat more closely. The differences affect moisture retention, exterior development, and how often you need to check the cooking environment.
| Approach | Moisture retention | Exterior and airflow | Attention needed |
|---|---|---|---|
| Uncovered | Low: surface moisture can evaporate freely. | High airflow favors a drier, more developed exterior and bark formation. | High: monitor the surface and cooker conditions, especially in dry environments. |
| Covered in a pan or cooker | Moderate to high: trapped vapor limits evaporation around the meat. | Low airflow; the humid space tends to soften the exterior rather than keep it dry. | Low to moderate: the lid maintains a more enclosed cooking environment. |
| Wrapped in foil or butcher paper | High: the wrap holds moisture close to the brisket; foil is more sealed, while paper allows more vapor to escape. | Low airflow; the protected surface can soften compared with an uncovered cook. | Moderate: wrapping requires a handling step, then reduces direct exposure to the cooker. |
Choose uncovered cooking when a pronounced bark matters most, and cover or wrap when retaining moisture takes priority. For a balance, start uncovered and wrap once the exterior is developed; cover from the start for a softer surface.
Check Brisket Tenderness
Brisket tenderness is a feel-based check, not a result you can confirm by the clock alone. A common finishing range is 195–205°F internally, but the reading is only a prompt to test the meat; some briskets soften sooner, while others need more time. Check several thick areas because heat and connective tissue do not change at the same rate throughout the cut. Use the probe’s resistance and the meat’s response together to decide whether to keep cooking.
Use texture cues
Use a thin skewer or instant-read thermometer probe to assess tenderness by feel, rather than treating a temperature reading as proof. Test the thickest sections with gentle, consistent pressure.
- Push the probe into the thickest part of the flat; it should slide in with little resistance, rather than meeting a firm, rubbery push.
- Test more than one point in the flat, since connective tissue can soften unevenly and one easy entry does not confirm the whole section is tender.
- Check the point separately, where its thicker shape and richer marbling can make it feel different from the leaner flat during the same cook.
- Notice whether the meat yields around the probe instead of gripping it tightly; a slight, smooth drag can be normal, but a hard stop signals resistance.
- Withdraw the skewer slowly and feel for repeated catches or dense bands, which can reveal sections that have not softened as much as the surrounding meat.
- Compare the probe’s movement at several depths, not just near the surface, because a tender outer layer can conceal a firmer center.
A probe-tender brisket texture feels supple, with the meat giving way under light pressure rather than springing back firmly. If one spot feels effortless but another resists, keep cooking and test again; tenderness must be reasonably even across the thick sections.
Account for variation
Tenderness develops at different rates depending on the cut, thickness, equipment, and cooking method. A thick point and a thin flat do not warm or soften identically, and a whole packer brisket can have different textures from end to end. Oven-baked, smoked, and slow-cooker briskets also experience different heat and moisture conditions, so a time that works for one setup is not a reliable finish point for another.
Check the thickest part of the flat, then test the point and any visibly dense areas separately. Avoid judging the brisket by the easiest probe entry: if another substantial section still feels tight or pushes back, connective tissue there needs more time to soften. Return it to the same cooking environment and continue in short intervals, then repeat the checks in those resistant areas. As the meat approaches tenderness, test more often so it does not pass from yielding to overly soft.
Use temperature as context, not a deadline: briskets may become tender at different readings, even when cooked with the same method. Let resistance guide the next step; keep cooking until the thick sections yield consistently.
Rest, Slice, and Serve
The final steps affect whether brisket reaches the table juicy and easy to eat. Give the meat time to settle after cooking, then cut it in a way that makes each bite more tender. Pay attention to the direction of the fibers, which can change between the flat and point. Serve the slices while warm, and handle any leftovers promptly.
Allow the meat to rest
Rest the cooked brisket before carving: a whole packer typically benefits from 45 to 60 minutes, while a smaller flat may be ready after about 30 minutes. During the pause, the temperature evens out and the meat’s structure settles, so less liquid runs onto the board when you slice. This rest is part of finishing the cook, not a reason to leave the brisket unattended for hours.
Keep the brisket loosely tented with foil on a warm platter or cutting board; a tight wrap can trap steam and soften the bark. It is ready to cut when the heavy steam has subsided and the meat remains warm throughout. If you need to hold it longer, keep it at or above 140°F, rather than letting it cool on the counter.
Serve slices soon after cutting, with the board juices spooned over the meat if desired. Refrigerate leftovers within two hours of cooking, or within one hour when the room is above 90°F. Divide large pieces into shallow containers and refrigerate at 40°F or below; use within three to four days. Reheat leftovers to 165°F, checking the center with a food thermometer.
Slice across the grain
Find the grain by looking for the long, parallel muscle fibers across the cooked surface; they appear as fine lines running in one direction. Set the brisket on a stable board and turn it so your knife will cross those lines at a right angle. Cutting with the grain leaves long fibers in each bite, while cutting across them shortens the fibers and makes the meat seem more tender.
The flat and point do not always share the same grain direction. The flat usually has a more uniform set of fibers, while the point’s fibers run at a different angle. If the direction changes noticeably, separate the muscles along their natural seam and rotate each piece before slicing. For slicing brisket against the grain, follow the fibers of each section rather than continuing in one direction across the entire packer.
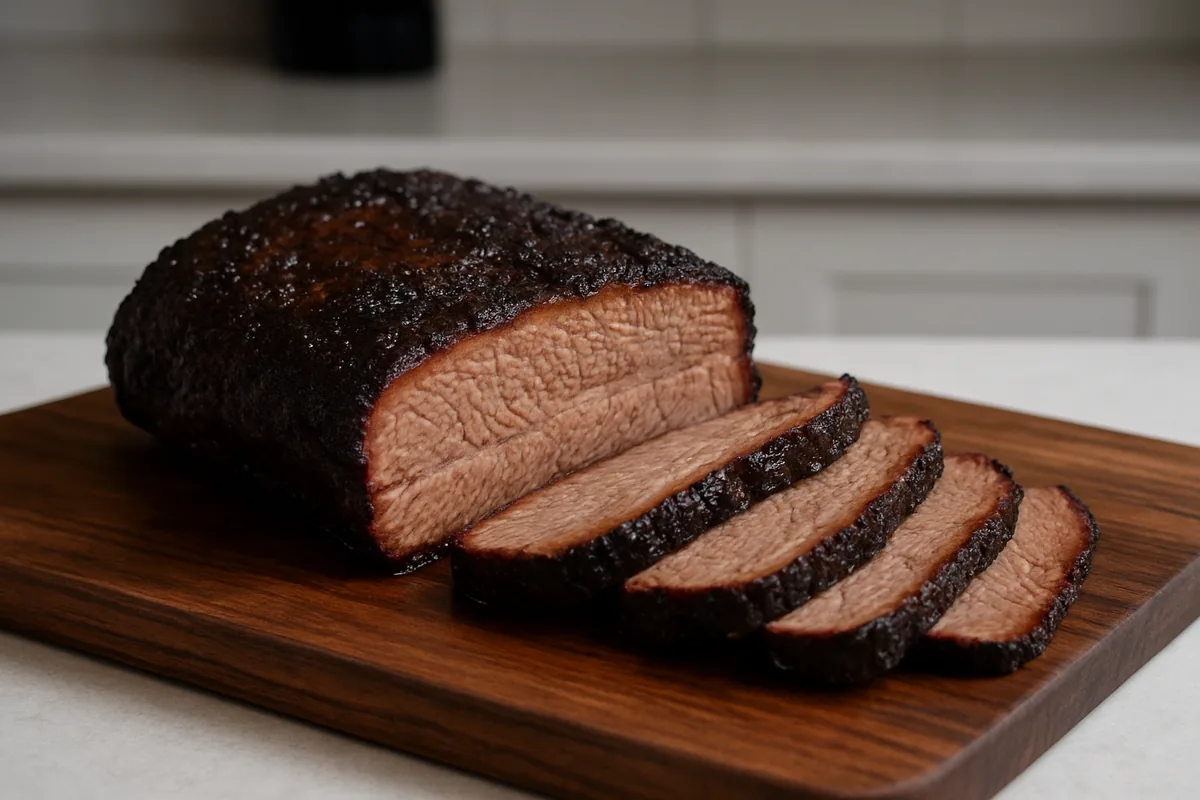
Use a sharp, long slicing knife and make smooth strokes instead of sawing back and forth. Aim for even slices about ¼ inch thick: very thin slices can fall apart, while much thicker ones leave longer fibers to chew. Cut only what you plan to serve, keeping the remaining brisket whole so its cut surfaces do not dry out. A brief rest followed by grain-aware, even slicing is a reliable way to serve brisket moist and tender.