What You Need for Beef Stew
A balanced beef stew starts with a cut that can soften during a long, moist cook and ingredients that build savory flavor without masking the beef. The beef stew ingredients you choose also determine how rich the broth tastes and how substantial the finished bowl feels. Select vegetables that hold their shape, then match the cooking liquid and thickener to the texture you prefer. These choices give a homemade beef stew a dependable foundation before cooking begins.
Choose the beef
For a classic beef stew, choose a well-worked braising cut with visible connective tissue and some intramuscular fat. Slow, moist cooking softens collagen into gelatin, giving the meat a tender texture and adding body to the liquid.
| Cut | Connective tissue and fat | Flavor | How it becomes tender | How it is commonly sold |
|---|---|---|---|---|
| Chuck | Good marbling with seams of connective tissue | Rich, beefy flavor | Collagen softens during slow cooking; the meat becomes succulent while retaining useful pieces | Chuck roast, shoulder roast, or stew cubes |
| Brisket | Noticeable connective tissue and a fat cap, depending on the piece | Pronounced beef flavor | Long braising softens its firm fibers; slice or break it into serving-size pieces after cooking | Whole brisket or flat and point sections |
| Beef short ribs | Richly marbled, with connective tissue around the ribs | Deep, rich flavor | Slow braising softens the tissue and loosens meat from the bone | English-cut or flanken-cut ribs; English-cut pieces are better suited to stew |
| Shank | High in connective tissue, with little fat in the lean muscle | Robust, concentrated flavor | Extended moist cooking softens collagen; the result is tender and gelatin-rich | Cross-cut slices, often bone-in |
| Round | Lean, with less marbling and connective tissue than chuck | Mild beef flavor | It can be braised, but has less fat and gelatin to protect its texture | Top or bottom round roasts and steaks |
Among the best cuts of beef for stew, chuck is a reliable first choice: its balance of marbling and connective tissue suits slow cooking, and it is commonly available as a roast or stew cubes. Brisket, short ribs, and shank also work well when you want their distinct textures and richer braised flavor.
Lean, quick-cooking cuts such as sirloin or tenderloin are less suitable. They contain less connective tissue to convert into gelatin and can turn dry or firm during the prolonged cooking a stew needs; reserve them for faster methods instead.
Prepare vegetables and liquid
Choose vegetables and liquid for distinct jobs: some build sweetness and aroma, while others provide the savory base and body. The vegetables for beef stew and the thickener you choose also influence how clearly each ingredient keeps its texture.
- Carrots: Their natural sweetness balances savory beef and broth; pieces that are not too small are less likely to lose their shape as the stew cooks.
- Potatoes: They make the stew more substantial and release some starch into the liquid; waxier types generally hold their shape better than floury varieties.
- Parsnips or turnips: These root vegetables add earthy, gently sweet or peppery notes, giving the vegetable mix more depth than carrots and potatoes alone.
- Onion, celery, and garlic: These aromatics supply a savory foundation; onion brings sweetness, celery adds a vegetal note, and garlic contributes a pungent, rounded flavor.
- Beef broth: It supplies moisture and a direct beef flavor. Choose a broth whose saltiness suits your preference, since seasoning in the liquid becomes more concentrated as it cooks.
- Flour or starch slurry: Flour can add a soft, opaque body when incorporated into the stew; a slurry of cornstarch and cold water thickens the liquid with a glossier finish.
Water can also serve as cooking liquid, but it contributes less flavor than broth. For beef broth and seasoning, keep the liquid savory and let the vegetables and aromatics add their own distinct flavors.
Choose flour when you want a more integrated, traditional body, or a starch slurry when you prefer a clear, glossy finish. Either option can help create thick beef stew gravy without changing which vegetables provide sweetness, earthiness, or structure.
Prepare the Ingredients
Careful preparation gives each piece time to cook at a similar rate and keeps the work orderly once the pot is hot. Cut the beef and vegetables with their cooking times in mind, rather than making every ingredient the same size. Pat the beef dry and measure the seasonings and recipe liquid before you begin. With ingredients and tools arranged within reach, you can move through a beef stew recipe without stopping to chop or measure midway.
Cut ingredients consistently
Cut the beef into pieces about 1½ to 2 inches across, keeping them as uniform as possible. Pieces of similar size heat at roughly the same rate; a mix of small scraps and large chunks can leave some dry before the largest pieces are tender. Trim away thick exterior sinew, silver skin, and hard surface fat with a sharp knife, but leave fine marbling and soft connective tissue within the meat.
Cut firm vegetables into pieces about 1 to 1½ inches wide so they hold their shape during a long cook. If a vegetable is especially dense, such as a large potato or thick root, make its pieces slightly smaller than softer vegetables. Cut onions into roughly ½-inch pieces, and mince garlic finely so it disperses through the base rather than remaining in large bites.
Keep quick-cooking vegetables larger than finely chopped aromatics, or set them aside for a later addition according to the recipe. For example, small pieces of celery soften sooner than large chunks of carrot or potato. A ruler is unnecessary: compare each piece with the others as you work, and make a final pass to halve any noticeably oversized chunks. Consistent cuts are more useful than exact precision.
Season and set up
Blot the beef thoroughly with paper towels until its surfaces feel dry; damp meat releases moisture into the pot instead of beginning with a dry surface. Spread the pieces on a tray or plate, then season them evenly with the salt and pepper specified in your recipe. Season shortly before cooking, and keep the pieces in a single layer so you can pick them up without separating a pile.
Finish all chopping before heating the pot. Put the prepared vegetables and aromatics in separate bowls when they will be added at different stages, and measure the recipe’s broth or other cooking liquid into a jug. Measure dried herbs, spices, and any thickener into small dishes rather than reaching into containers over a hot pot.
Set the heavy pot on the stove with tongs, a wooden spoon, a cutting board, and a clean tray for cooked ingredients close by. Keep the ingredient bowls in the order you expect to use them, with the beef first and later additions beside it. This mise en place lets you stay at the stove and add each prepared ingredient promptly, instead of pausing to cut vegetables or measure liquid.
Brown the Beef and Build the Base
Browning creates a savory crust on the beef and leaves browned bits, called fond, on the bottom of the pot. Those bits dissolve into the cooking liquid and give the stew base a deeper, roasted flavor. Work in batches so the meat sears rather than steams, and adjust the burner if the fond starts to darken too quickly. Once the beef is browned, soften the aromatics and use liquid to lift the fond from the pot.
Brown in batches
For how to brown beef for stew, use a heavy pot and give each batch enough room to sear. Heat the empty pot over medium-high for 2 to 3 minutes, then add a thin film of oil; it should shimmer but not smoke.
- Pat the beef thoroughly dry with paper towels; surface moisture delays browning, while dry meat makes direct contact with the hot pot.
- Arrange a single layer with a little space between pieces, leaving about half the pot’s surface uncovered rather than packing it full.
- Let the first side sear undisturbed for about 2 to 3 minutes; look for a deep brown crust before turning a piece.
- Turn the pieces with tongs and brown two or three more sides, allowing roughly 6 to 8 minutes per batch depending on cube size.
- Transfer browned beef to a plate without stacking it tightly, so the crust stays intact and the pot remains available for the next batch.
- Repeat with the remaining beef, adding a small amount of oil only if the pot looks dry; keep the burner at medium-high.
- Watch the residue between batches: brown bits are desirable, but reduce the heat if they turn very dark or begin to smell burnt.
Crowding traps steam released from the meat, lowering the surface temperature and leaving the pieces gray instead of crusted. A browned layer on the beef and a brown, not black, film on the pot are the cues to continue; the fond supplies concentrated roasted flavor when liquid is added.
Add aromatics and deglaze
After the last batch, lower the heat to medium and check the pot before adding aromatics. If a thin layer of fat remains, cook the onion in it; otherwise add about a teaspoon of oil. Stir the onion and other firm aromatics for 4 to 6 minutes, until softened and translucent at the edges. Add minced garlic near the end and stir for about 30 seconds, just until fragrant; garlic can scorch quickly against hot metal. Pour in roughly ½ cup of beef broth or another recipe liquid while the pot is still warm. It should bubble gently on contact. Scrape the bottom with a wooden spoon, working across the whole cooking surface until the stuck brown bits loosen and dissolve. Keep the heat moderate: a gentle bubble helps release fond, while a hard boil can reduce the liquid before the pot is fully scraped. If the residue is dark brown, it will enrich the base; black, acrid-smelling spots can make it taste burnt. Return the browned beef and any juices collected on the plate to the pot, then stir so the liquid coats the meat and aromatics. The dissolved fond, softened onion, garlic, and beef juices form the stew base. Add the remaining cooking liquid called for in your recipe after scraping is complete, rather than leaving flavorful residue behind.
Simmer Until the Beef Is Tender
Once the stew reaches a simmer, steady, gentle heat gives the beef time to soften without breaking the cooking liquid into a rolling boil. A covered pot limits evaporation, while a small opening in the lid lets some steam escape if the liquid is reducing too slowly. For most beef stew, plan on roughly 2 to 3 hours on the stovetop, then use the beef’s texture—not the timer alone—to judge doneness. Vegetables need different cooking times, so adding them in stages helps keep their shapes while the beef becomes tender.
Maintain a gentle simmer
After the liquid returns to a simmer, lower the heat until only a few small bubbles rise to the surface now and then. A rolling boil churns the pot, can make the liquid evaporate quickly, and may leave the outside of the beef overcooked before its connective tissue softens. On many stovetops, this means using the lowest setting that can maintain occasional bubbles; adjust the burner if the surface becomes still or starts boiling vigorously.
Cover the pot fully when the liquid is reducing faster than you want, or leave the lid slightly ajar when you want a little more evaporation. Check the simmer after 10 to 15 minutes because a heavy Dutch oven can hold heat and continue bubbling after the burner is lowered. Keep enough liquid around the beef for the pieces to cook gently, and stir occasionally so nothing catches on the bottom.
Allow about 2 to 3 hours of gentle stovetop cooking for typical stew-sized beef pieces, with larger pieces or a particularly low simmer sometimes taking longer. Begin checking after about 1 hour and 45 minutes rather than assuming the stew is ready at a fixed time. The exact beef stew cooking time varies with the cut, the size of the pieces, and how steadily the pot simmers.
Test a piece with a fork: it should yield with light pressure and separate easily, without feeling rubbery or requiring a hard pull. If it still resists, keep the pot at the same gentle simmer and check again in 20 to 30 minutes. Tenderness comes from sustained, gradual cooking, so raising the heat to hurry the process is less reliable than allowing extra time.
Add ingredients in stages
Vegetables do not all soften at the same rate. Add firm roots first, potatoes later, and quick-cooking vegetables near the end; use the ranges below as a guide, counting backward from the expected finish and checking the beef before you add the final vegetables.
| Vegetable group | Examples | Typical cooking time | When to add |
|---|---|---|---|
| Firm roots | Carrots, parsnips, turnips | 60–90 minutes | Early in the simmer, when the beef still needs substantial cooking |
| Potatoes | Waxy or all-purpose potatoes | 35–45 minutes | When the beef is partway tender, so they finish without falling apart |
| Quick-cooking vegetables | Green beans, peas | 5–20 minutes | Near the end; allow less time for peas and more for green beans |
These are approximate ranges for pieces around 1 to 1½ inches; smaller pieces cook faster, while larger ones need longer. If the beef reaches fork tenderness before a firm root is done, continue simmering until that vegetable is tender and check the potatoes separately. Staging prevents soft vegetables from spending the full beef cooking window in the pot, helping them retain their shape while the beef finishes tenderizing.
Adjust the Stew and Fix Common Problems
A finished stew should have gravy that coats a spoon and beef that yields easily when pressed with a fork. Small adjustments work better than adding a large amount of liquid or thickener at once. Change one thing, let the pot respond, then check the texture again. Heat and timing matter too: a hard boil can leave beef firm while vegetables continue to soften. Use the cues below to correct the pot you have and make the next batch more predictable.
Thin or thick consistency
If the gravy looks watery after the beef and vegetables are cooked, simmer the pot uncovered so steam can escape. Keep the liquid at a gentle simmer, with small bubbles rather than a rolling boil, and check it after 10 minutes. Reduction concentrates the broth and seasoning as well as thickening the gravy, so taste again before adding salt. If the beef or vegetables are already at their ideal texture, remove them with a slotted spoon while the liquid reduces, then return them to the pot.
For an overly thick stew, stir in warm beef broth a quarter cup at a time. Mix gently, wait about 2 minutes for the liquid to distribute, and reassess before adding more; a few tablespoons may be enough for a small pot. Water can loosen the gravy, but broth usually preserves its savory flavor. Avoid pouring in a full cup at once, which can turn a rich gravy thin and dilute the seasoning.
To thicken a thin gravy without reducing it, whisk 1 tablespoon of flour with 2 tablespoons of cold water, or 1 tablespoon of cornstarch with 1 tablespoon of cold water, until smooth. Stir in only 1 tablespoon of the slurry at first, simmer for 2–3 minutes, then pause and check whether the gravy coats the back of a spoon. Add another small amount only if needed; flour needs a few minutes of cooking to lose its raw taste, while cornstarch thickens quickly. Never add dry flour or starch directly to the hot pot, where it can form lumps.
Tough beef or soft vegetables
Beef that is still chewy usually needs more time for its connective tissue to soften, especially when the pot has been cooking for less than the cut requires. Chuck and other collagen-rich braising cuts can become tender with prolonged moist cooking, while lean steak cuts may remain firm and dry in a long stew. A hard boil can also tighten muscle fibers and make the meat seem tougher. Lower the heat until only occasional small bubbles break the surface, cover the pot, and cook for another 20–30 minutes before testing a large piece with a fork.
If the beef remains resistant, repeat that short cooking interval and test again rather than raising the heat. At a gentle simmer, stew liquid is commonly around 190–205°F; a rolling boil is unnecessary for tenderizing and can break vegetables apart. For the next batch, choose a well-marbled chuck or another braising cut, cut it into similarly sized chunks, and allow enough time for the pieces to yield easily. If the meat is very lean or cut from a quick-cooking steak, changing to a suitable braising cut is more effective than extending the cook indefinitely.
Vegetables that have turned mushy were often added too early, cut too small, or left cooking after they were tender. You cannot restore their shape in the current pot, but you can lift them out gently and keep them aside while the beef finishes; return them only long enough to warm through. For a fresh pot, use sturdy pieces about 1 inch across and add them late enough to finish tender, not collapsing. Add delicate vegetables such as peas during the final 5–10 minutes. Check a potato or carrot with the tip of a knife: it should slide in with slight resistance, not split under gentle pressure.
Serve and Store Beef Stew
Serve beef stew hot, with an accompaniment that catches its gravy or balances its richness. You can plate it as a complete meal or spoon it over a starch for a heartier serving. Fresh herbs or a little black pepper add contrast; keep the garnish modest so the beef and vegetables remain central. For leftovers, transfer the stew to shallow containers promptly so it cools evenly before refrigeration.
Serving options
Crusty bread is an easy choice when you want to soak up the gravy. Set a warm loaf or sliced rolls on the table and let each person tear off pieces as needed. For a more filling plate, spoon the stew over mashed potatoes, rice, or cooked noodles. Mashed potatoes make a soft base, while rice and noodles spread the sauce through each serving; choose one accompaniment rather than crowding the bowl with several.
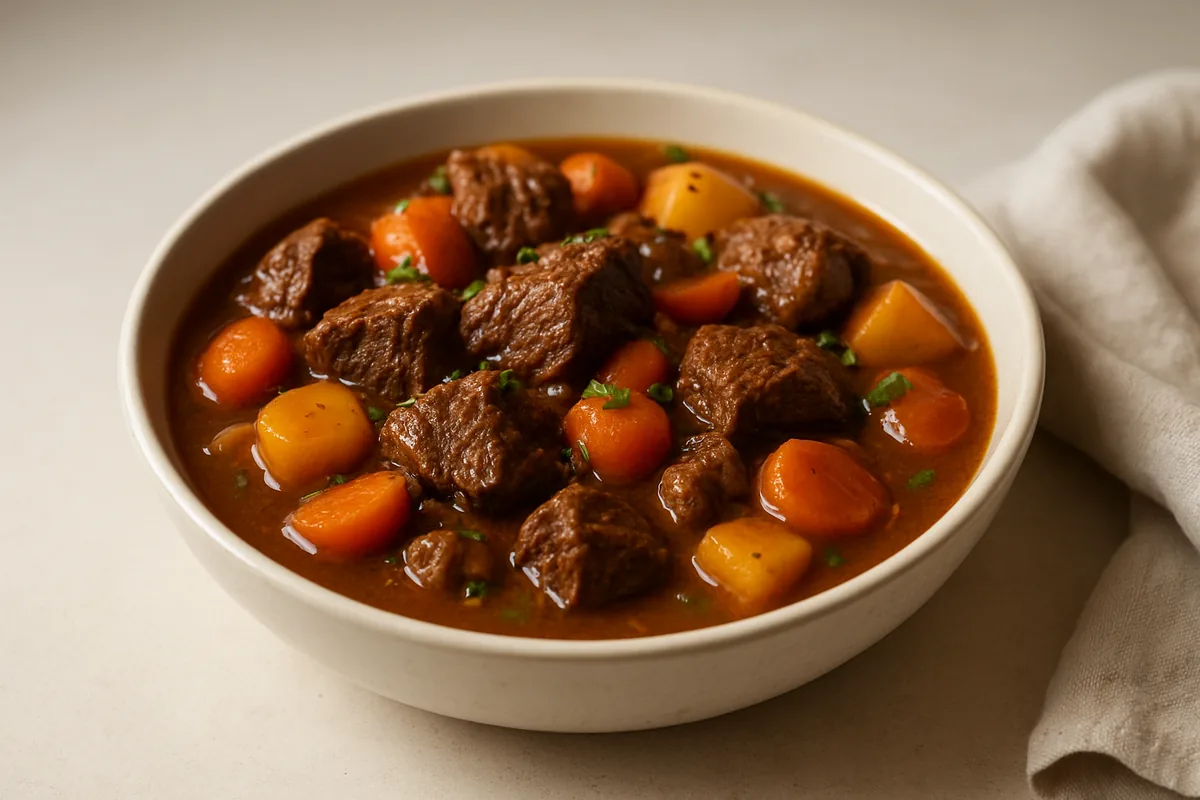
Ladle the stew into warmed bowls and serve it hot, with a generous mix of beef, vegetables, and gravy in each portion. If serving it over potatoes, rice, or noodles, add the stew just before eating so the starch holds its texture. A small sprinkle of chopped parsley or thyme brings a fresh, herbal contrast, and a light grind of black pepper adds a sharper note. Use only a little garnish: it should brighten the stew without covering its savory flavor.
For a simple meal, pair each bowl with bread and keep the side portions modest. This lets the stew stay the main dish while giving diners an easy way to enjoy every bit of gravy.
Handling leftovers
Move leftover stew out of the cooking pot and into shallow, clean containers; smaller portions cool more evenly than a deep, full pot. Refrigerate it promptly, within two hours of cooking, and keep the containers covered. Set them in a refrigerator at 40°F (4°C) or colder, leaving space around them so cool air can circulate. Avoid leaving stew on the counter to cool for an extended period.
Reheat only the portion you plan to eat. On the stovetop, warm it in a saucepan, stirring gently so the meat and vegetables heat throughout. In a microwave, cover the bowl, stir partway through, and check more than one spot because dense portions can heat unevenly. Bring each reheated portion to 165°F (74°C), checking with a food thermometer when available. If the center is not hot enough, continue heating and check again.
Keep the remaining containers covered in the refrigerator while you serve. Returning the unused stew to cold storage promptly limits the time it spends at room temperature and helps preserve its texture for the next meal.