A Practical Guide to Cooking Beef
A practical guide to beef cuts, cooking techniques, and recipes, with clear explanations of how different cuts behave and which methods suit each dish.
Beef Cuts and How They Cook
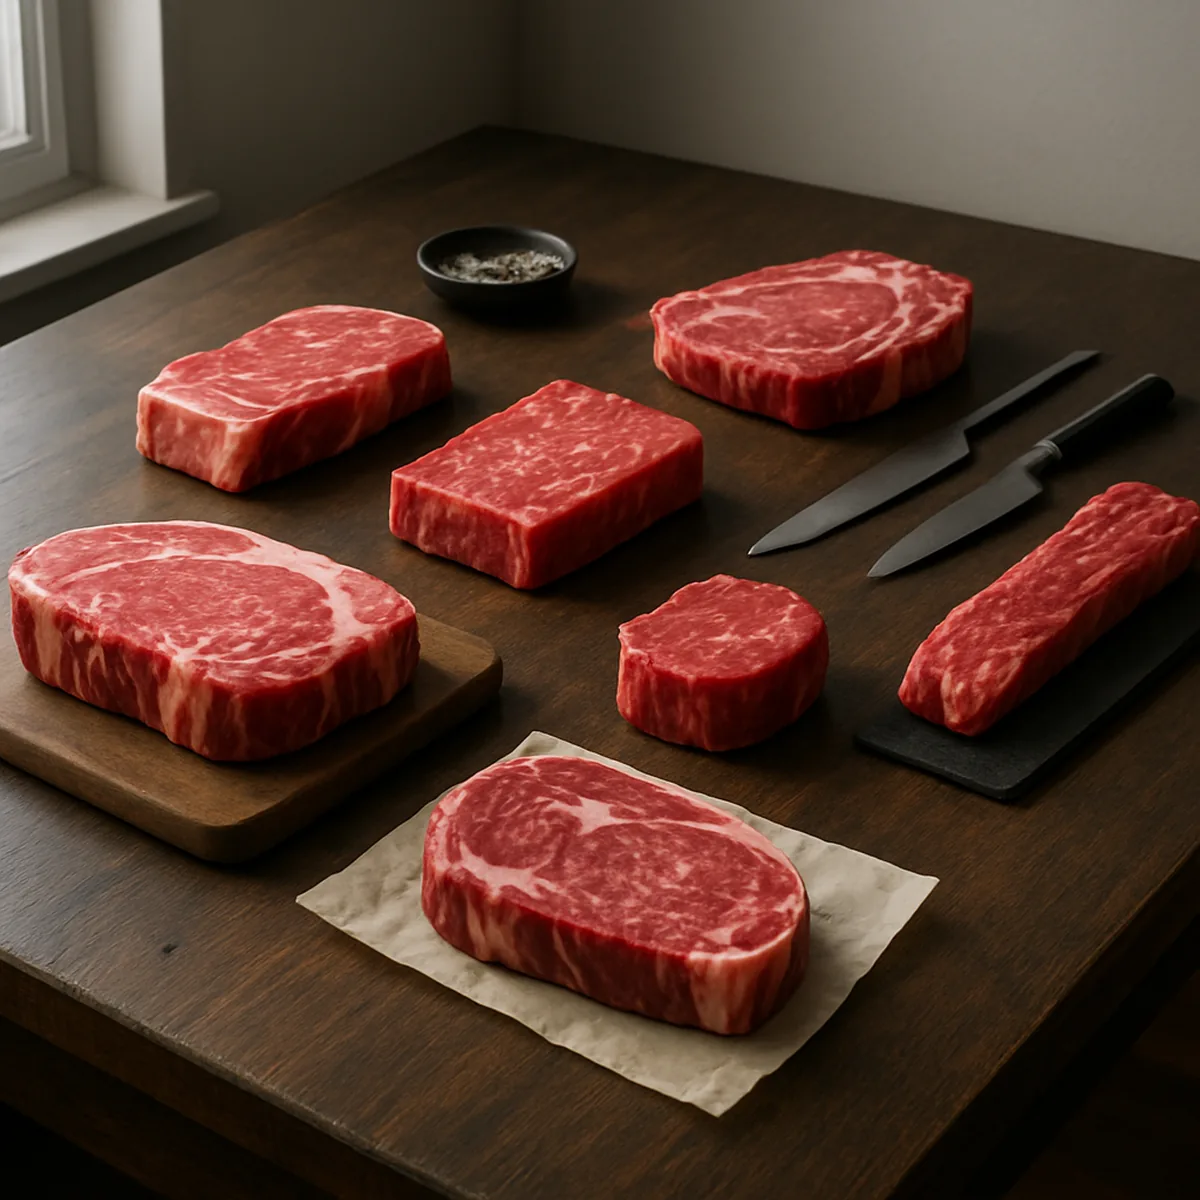
A clear guide to beef cut names, where cuts come from, and how texture and connective tissue affect cooking methods, including ways to use beef shank.
Beef Cuts
Recipes
Ground Beef
Beef Stew
A Practical Guide to Cooking Beef
Beef Cooking Guide is an independent English-language information guide to beef cuts, cooking methods, and familiar dishes. Its focus is how a cut’s structure influences the time, heat, and technique it needs. A cut’s structure helps you compare quick cooking with methods that soften meat gradually. The guide also connects those choices to dishes ranging from ground beef meals to roasts and slow-cooked preparations. Start by identifying the cut, then match its texture and fat to the way you plan to cook it.
Cuts, Structure, and Cooking Methods
A cut’s location helps explain its texture. Muscles that do little work, such as the tenderloin along the spine, have relatively fine fibers and little connective tissue, so brief, high heat can leave them tender. Muscles used for movement, including the shoulder and shank, develop more connective tissue and firmer fibers. Those cuts usually benefit from longer cooking, which gradually softens collagen in moist heat rather than relying on a quick sear alone. Fat affects juiciness and flavor, but its position matters. Intramuscular marbling is distributed through the meat and can contribute richness as a steak cooks; a cap of external fat can baste the surface and may be trimmed or rendered. A lean, fine-textured cut can dry if held over heat too long, while a collagen-rich cut may remain chewy when cooked briefly. These differences explain why a tender steak and a well-worked roast do not respond equally to the same timing. For a fast method, choose a naturally tender cut of even thickness and apply direct heat, as with a ribeye or strip steak. For tougher cuts, use lower heat over a longer period: braising a chuck roast in a covered pot or slow-cooking beef shank gives connective tissue time to soften. Thickness, bone, and the amount of fat also change cooking time, so use texture and doneness checks alongside the clock. Matching structure to method is the foundation of how to cook beef successfully.
How the Guide’s Topics Fit Together
The cut-and-method principles carry through the dish guides, but each preparation adds a different decision. Ground beef focuses on choosing a meal format and coordinating its cooking, while stew centers on pieces that can simmer until tender. Stroganoff uses sliced beef and brief browning, making cut choice and slicing direction important. Wellington combines beef with pastry and a filling, so preparation and assembly matter alongside the cut. These examples show how the same meat responds differently when minced, cubed, sliced, or kept whole. Other topics examine preservation, shape, and specialized ingredients. Corned beef is considered as a meal with cabbage or as hash; brisket receives attention as a large cut that needs careful cooking and a rest. Beef ribs and short ribs are compared by their shape and structure, while the slow-cooking discussion considers suitable cuts and explains what beef tallow is. Wagyu and other beef are compared through terminology, marbling, flavor, and cooking differences. Together, these subjects connect everyday choices with the physical form and composition of the beef. Treat each dish as a practical application rather than assuming one method suits every cut. A quick-cooked steak, a simmered stew, and a pastry-wrapped roast call for different preparation, even when all begin with beef. Choose the cut for the dish’s cooking process first; that is the clearest route to a reliable result.
Beef Cuts and How They Cook
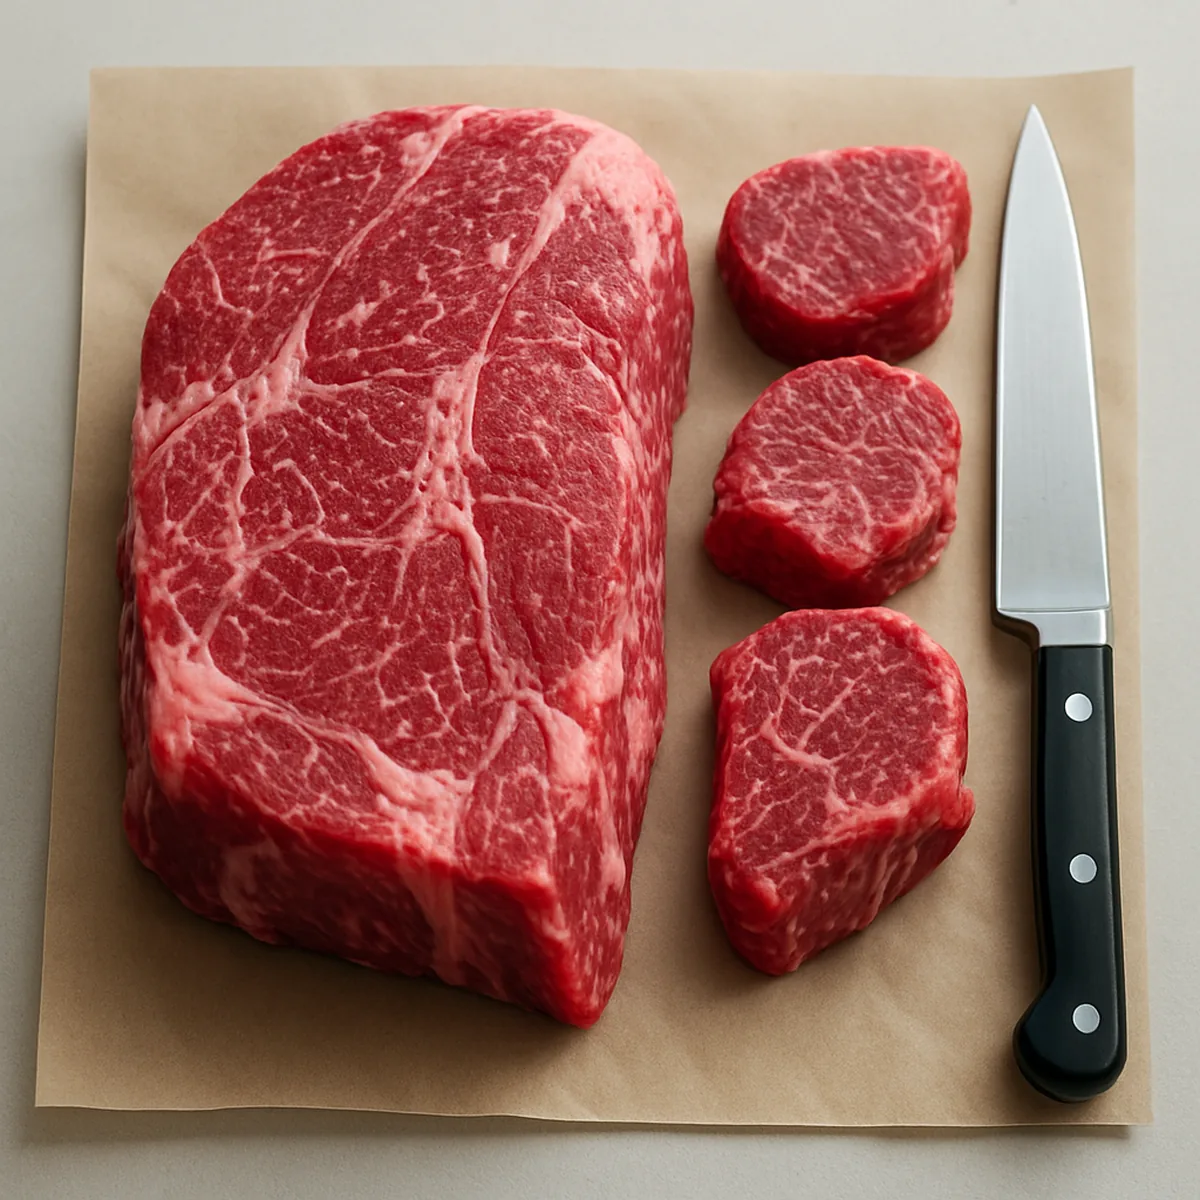
A cut’s location on the animal affects how its muscle works, how much connective tissue it contains, and how it responds to heat. Tenderness, moisture, and cooking speed depend on the combination of these traits rather than the cut’s name alone. Fat within the muscle can add richness and help meat remain succulent, while collagen-rich tissue needs time and moisture to soften. These differences make choosing the right cut of beef more straightforward.
How Cut Structure Affects Cooking
The table compares common cut locations and the structural traits that shape their texture. These are typical patterns: trimming, marbling, and the animal’s individual muscles can change how a particular piece cooks.
| Location and example | Muscle use and connective tissue | Fat and texture | Cooking effect |
|---|---|---|---|
| Loin, including tenderloin | Back muscles do relatively little work, and the meat has little connective tissue. | Tenderloin is lean; some neighboring loin cuts have more marbling. | Its tender structure suits brief, high-heat cooking, but lean pieces can dry out if cooked too long. |
| Rib section | Upper-back muscles are less heavily worked than shoulder or leg muscles. | Many rib cuts have visible intramuscular fat, which contributes richness and a moist impression. | Steaks can take direct heat; larger pieces can be roasted so the interior cooks more gently. |
| Shoulder, including chuck | Frequently used muscles contain more connective tissue, including collagen. | Fat varies by muscle and trimming; connective tissue can make the meat chewy when cooked briefly. | Extended moist cooking gives collagen time to soften, making braising a suitable method. |
| Hindquarter, including round | Leg muscles work during movement; many cuts are relatively lean and have firmer muscle fibers. | Less marbling means less internal fat to buffer against drying. | Thin, tenderized pieces can cook quickly, while larger or tougher pieces benefit from moist heat. |
| Lower leg, or shank | Supporting muscles and tendons contain substantial connective tissue. | It is not typically a highly marbled cut; collagen-rich tissue strongly affects texture. | Long, moist cooking softens the tissue; a quick sear alone leaves it firm. |
Collagen gradually softens during sustained cooking with moisture, while fat distribution affects richness and perceived juiciness. These structural differences explain why the same cooking time does not suit every cut.
Match Cuts with Cooking Methods
Tender cuts with little connective tissue, such as tenderloin and many loin steaks, suit quick methods: grilling, broiling, or pan-searing. High heat browns the surface before the interior has time to lose much moisture. Because lean meat has less intramuscular fat, close attention matters; prolonged cooking can leave it dry and firm. A thicker steak may need gentler finishing heat after browning, while a thin cut cooks through rapidly. Cuts with substantial connective tissue, including chuck and shank, respond better to longer cooking with liquid. Braising combines browning with covered, moist heat, allowing collagen to soften and the muscle to become more tender. A roast from a lean, active muscle needs a different approach from a collagen-rich cut, even if both are large pieces. The beef cuts guide maps more cuts to their typical uses; comparisons of beef ribs and short ribs, brisket, and slow-cooking cuts add detail about those specific choices. For how to cook beef successfully, match the method to the cut’s structure first: quick, direct heat for naturally tender pieces, and patient moist cooking for connective-tissue-rich ones.
Ground Beef Dinner Ideas
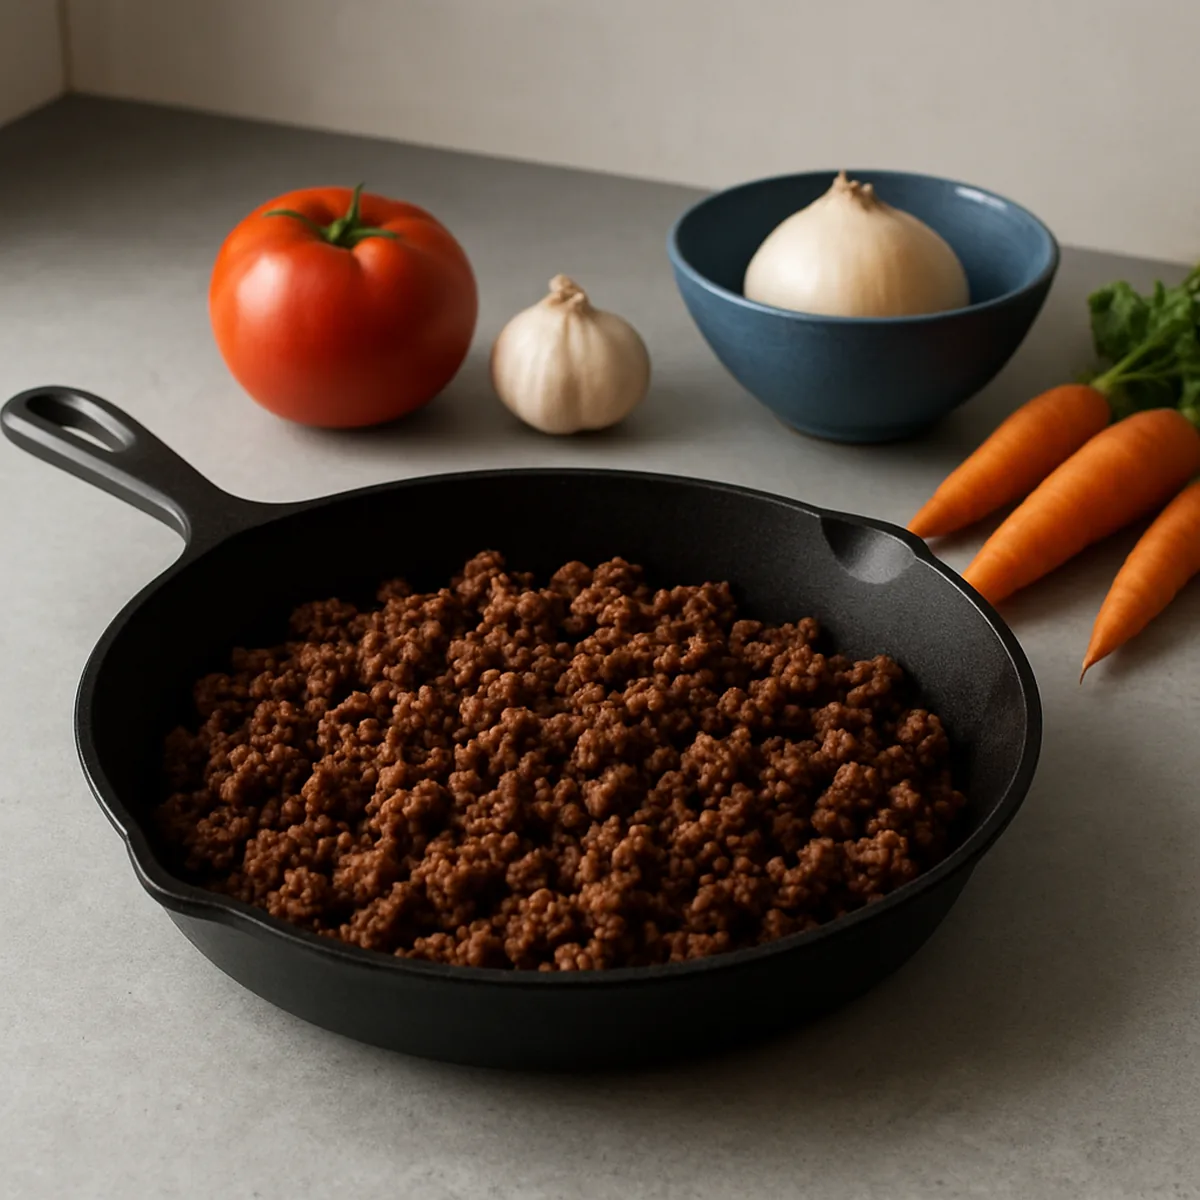
Ground beef suits weeknight meals because it can be divided, shaped, or crumbled to fit different dishes. The best format depends on how much hands-on shaping you want, whether the meat needs a browned surface, and how quickly the other components cook. A skillet meal keeps the process in one pan, while burgers and meatballs need deliberate portioning and casseroles rely on even layers. Planning the sequence before turning on the stove helps vegetables, grains, sauces, and beef finish together.
Choose a Dinner Format
Choose a format based on the texture you want and the time available for shaping, browning, and cooking the accompaniments. These options call for different handling even when they start with the same pound of ground beef.
- Skillet meal: Break the beef into small crumbles for quick, even browning, then add vegetables or sauce. Rice, tortillas, or noodles can be prepared alongside it.
- Meatballs: Mix gently with a binder, then shape into evenly sized balls, about 1½ inches across. Brown them in batches before finishing in sauce.
- Burgers: Divide the meat into loose portions and form patties without compacting them. Their broad, flat shape cooks quickly and pairs well with buns and simple toppings.
- Casserole: Brown crumbled beef before layering it with cooked or quick-cooking ingredients. A shallow dish heats more evenly than a deep one, and the topping can be prepared while it bakes.
- Stuffed vegetables: Cook the beef mixture before filling peppers or similar vegetables, especially when the vegetables need longer in the oven. Choose pieces of similar size for more even cooking.
For any format, match the accompaniments to the cooking sequence: a fast skillet works with quick-cooking vegetables, while a casserole can accommodate components that need time to soften or meld.
Coordinate Preparation and Cooking
Read the recipe through, then measure and chop the ingredients before heating a pan. Dice vegetables into similar-sized pieces so they soften at roughly the same rate; keep wet ingredients, seasonings, and any garnish in separate bowls. Divide the beef into the portions the dish requires before cooking: patties should be even in thickness, while meatballs should be consistent in size. For crumbled beef, leave the meat in larger pieces at first rather than stirring constantly, which gives the surface time to brown. Use a wide skillet and cook in batches if the pan would otherwise be crowded; excess moisture can prevent browning. Remove the browned beef when needed, cook firm vegetables first, and add quicker-cooking ingredients later. Return the beef to the pan when the sauce or other components are ready, allowing time for the flavors to combine without overcooking the vegetables. Prepare a side dish according to its own timing: start rice or pasta early enough to finish as the beef mixture comes together. Ground beef should reach 160°F (71°C), the USDA-recommended safe internal temperature. Serve promptly, with sauces and toppings ready at the table. The Ground Beef Dinner Ideas page offers more formats to adapt to these timing choices. For a reliable weeknight dinner, use a broad pan, keep portions even, and coordinate the slowest-cooking component first.
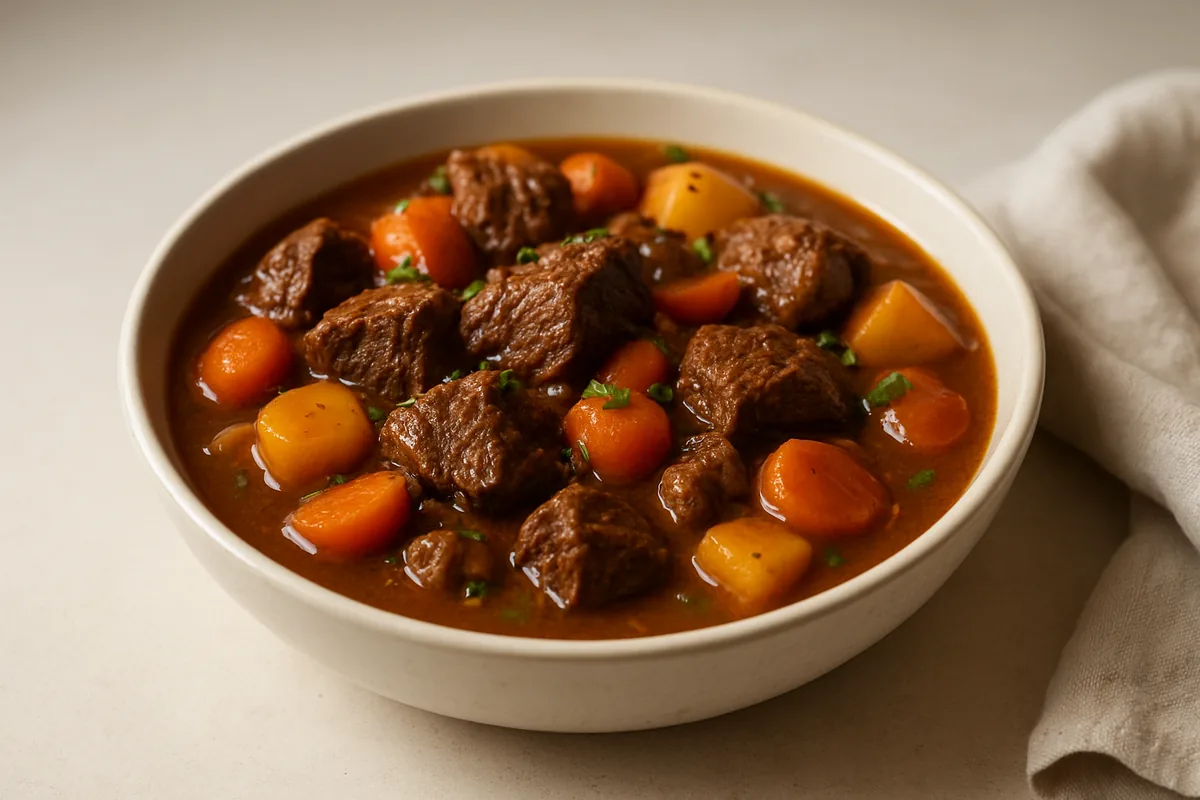
Beef Stew from Preparation to Serving
A good beef stew depends on choosing a cut that softens during a long, gentle simmer rather than drying out. Evenly sized pieces help the beef cook at a similar pace, while a dry surface makes browning more effective. After browning, liquid and steady low heat give connective tissue time to become tender. Check the meat itself near the end, since cut size and the simmer can affect how long the stew needs.
Choose and Prepare the Stew Cut
Choose a collagen-rich cut for stew, such as beef chuck from the shoulder or shank. These cuts contain connective tissue that gradually softens and turns gelatinous during prolonged cooking in liquid, giving the finished meat a tender texture and the broth more body. Lean, naturally tender steaks have less collagen and are better suited to quick cooking; simmering them for as long can leave them dry and stringy.
Cut the beef into pieces about 1½ to 2 inches across, trimming away thick, hard pieces of excess fat while leaving some marbling. Keep the pieces similar in size so smaller cubes do not become soft before larger ones are ready. If the grain is visible, cut across it where practical; shorter muscle fibers are easier to bite through.
Blot the pieces thoroughly with paper towels before seasoning. Surface moisture must evaporate before the meat can brown well, so damp beef tends to steam in the pan instead. Season the pieces evenly with salt and pepper shortly before cooking, then arrange them so they are ready to brown without delay. This preparation gives the stew a better browned base while leaving the collagen-rich cut to soften during the simmer.
Brown, Simmer, and Check Texture
Build the stew in stages: brown the beef, develop flavor in the pot, then simmer gently with enough liquid to cook the meat without boiling it hard. The pieces may need a few hours to soften, so judge readiness by texture rather than relying on a fixed cooking time.
- Heat a heavy pot over medium-high heat with a thin film of oil. Brown the beef in uncrowded batches, turning the pieces so several sides develop a deep brown crust.
- Transfer each batch to a plate, leaving the browned residue in the pot. If the bottom begins to scorch, lower the heat before adding the next batch.
- Add chopped onion and other stew aromatics to the pot, stirring to soften them and loosen the browned bits. Add garlic near the end so it does not burn.
- Stir in any tomato paste or flour called for by the recipe, then pour in stock or another suitable cooking liquid. Scrape the pot bottom to release the browned flavor.
- Return the beef and its juices to the pot. Add enough liquid to come partway up the meat, along with herbs, then bring the mixture just to a gentle simmer.
- Cover the pot and maintain a low simmer, with only occasional bubbles breaking the surface. Stir from time to time and add a little liquid if the pot looks too dry.
- Test a larger piece with a fork near the end. If it resists, continue simmering and check again; add quick-cooking vegetables later so they do not turn mushy.
When the beef yields easily to a fork but still holds its shape, taste the broth and adjust the seasoning. Serve the stew hot, with the beef and vegetables surrounded by the thickened cooking liquid.
A step-by-step beef stew guide follows the same sequence, from browning the meat to checking that the finished pieces are tender.
Beef Stroganoff Techniques
Beef stroganoff depends on a quick-cooking cut, thin even slices, and a sauce that stays creamy rather than boiling. Tender beef can be browned briefly and set aside while mushrooms and stock form the base. The beef returns at the end, limiting the time it spends in the hot pan. Cut choice and timing are especially important because a skillet method will not tenderize a tough piece of beef.
Choose and Slice the Beef
For a quick skillet stroganoff, choose tenderloin, top sirloin, or strip steak; these cuts become tender with a short sear and brief warming in the sauce. Tenderloin is very soft and mild, while sirloin and strip steak bring a firmer bite and beefier flavor. Flank steak can also work when sliced thinly across its long muscle fibers, but it should not be treated like a slow-braising cut.
Chuck and brisket need extended moist cooking to soften, so they are poor substitutes when the recipe calls for fast-cooked strips. If using one of these tougher cuts, braise it separately until fork-tender, then add the cooked pieces to the finished mushroom sauce. That approach takes longer but avoids leaving chewy beef in a sauce that only simmers for a few minutes.
For even cooking, cut the steak into strips about 2 to 3 inches long and 1/4 inch thick. First identify the direction of the grain—the visible lines in the meat—then slice across those lines rather than parallel to them. Shortening the fibers this way makes each bite easier to chew. Keep the pieces close in size so thin strips do not dry out while thicker ones are still cooking; pat the surface dry before browning to help them sear instead of steam.
Brown, Make the Sauce, and Serve
Heat a wide skillet until hot, add a thin film of neutral oil, and brown the beef in small batches. Spread the strips in a single layer and sear for roughly 30 to 60 seconds per side; crowded meat releases moisture and turns gray rather than developing a browned surface. Transfer each batch to a plate while the center is still underdone, since the strips will warm through again in the sauce.
Use the same skillet for the sauce. Add sliced mushrooms—about 8 ounces for 1 pound of beef—and cook for 5 to 7 minutes, stirring until their released liquid has mostly evaporated and the edges begin to brown. Soften a little chopped onion or shallot if desired, then stir in about 1 tablespoon of flour and cook it for a minute. Pour in roughly 1 cup of beef stock gradually, scraping up the browned bits from the pan, and simmer until the sauce lightly coats a spoon. A teaspoon of Dijon mustard can add a gentle sharp note.
Reduce the heat before adding sour cream; for this amount of sauce, about 1/2 cup is a useful starting point. Stir a few spoonfuls of warm sauce into the sour cream first, then mix it back into the skillet over low heat. Do not let the sauce boil after the sour cream goes in, because high heat can make it separate or turn grainy. Return the beef and any plate juices just long enough to warm the strips through, usually 1 to 2 minutes.
Serve immediately over egg noodles, rice, or mashed potatoes, which catch the mushroom sauce without competing with the beef. The stroganoff recipe guide can help coordinate the cut, sauce, and timing; for a reliable skillet result, use thinly sliced tender steak, brown it in batches, and finish it gently in the sauce.
Beef Wellington Preparation
Beef Wellington depends on coordinating a tenderloin, a concentrated mushroom filling, a moisture barrier, and crisp puff pastry. Each component needs the right preparation and temperature before assembly. Keeping the layers cool and the filling dry helps the pastry bake evenly instead of turning soggy. For exact quantities and a complete recipe sequence, consult a detailed Beef Wellington guide.
Prepare the Pastry and Filling
Beef tenderloin provides a relatively even, tender center, but its tapered shape can cook unevenly. Tuck the thin tail underneath and tie the roast into a compact cylinder with kitchen twine; sear it briefly on all sides, then remove the twine and let the meat cool completely. A hot tenderloin warms the pastry and can start melting its fat before baking, so chill the seared beef until it feels cold to the touch.
Mushroom duxelles supplies the Wellington’s savory layer. Finely chop mushrooms with shallot and cook them in a wide skillet until their released liquid evaporates and the mixture is almost paste-like; a wet filling can soak through the pastry. Spread the duxelles on a plate to cool rather than leaving it in a warm pan. A wrapping layer, such as prosciutto or a thin crepe, can separate the mushrooms from the pastry and help contain moisture. Keep that layer thin so it does not overwhelm the beef or make the roll bulky.
Use cold, pliable puff pastry, thawed according to its package directions but not left warm on the counter. Roll it evenly, about ⅛ inch thick, so it encloses the filling without thick folds. Cool the beef and duxelles before layering; warm components soften the pastry’s butter, while excess liquid weakens its crisp, risen structure.
Assemble and Cook Wellington
Lay the chilled wrapping layer on plastic wrap, spread the cooled duxelles in a thin, even coating, and set the tenderloin along one edge. Use the plastic to roll the layers snugly around the beef, then twist the ends and refrigerate the roll for about 15–20 minutes so it holds its shape. Remove the plastic, place the roll on the pastry, and wrap it with a modest overlap. Brush the pastry edges with beaten egg to help them seal, press out trapped air, and place the seam underneath on the baking tray.
Trim excess pastry rather than piling it into thick seams, which can remain doughy as the surface browns. Brush the exterior with egg wash and score a shallow pattern without cutting through the pastry; make a small vent or two to let steam escape. Chill the assembled Wellington for another 15–20 minutes while the oven heats to 400°F. Bake on a lined tray until the pastry is deeply golden, often around 35–45 minutes for a typical tenderloin, but use the roast’s size and its center temperature rather than time alone.
Check the center with an instant-read thermometer, inserting it through an end or a small vent. For a medium-rare culinary result, many recipes remove the Wellington around 120–125°F, allowing for carryover heat during the rest; this is below the USDA recommendation of 145°F followed by a three-minute rest for whole cuts of beef. Choose the doneness target with that distinction in mind. Rest the baked Wellington for 10–15 minutes before slicing with a sharp serrated knife, which helps keep the pastry intact. The most reliable result comes from fully cooling the filling and checking the beef’s center temperature rather than relying on pastry color alone.
Corned Beef and Cabbage or Hash
Corned beef and cabbage and corned beef hash are distinct meals built around the same cured brisket. One keeps the meat in a large piece and simmers it with vegetables; the other dices cooked meat with potatoes and browns everything in a skillet. The first is served as a hot plate with cooking liquid or mustard, while hash develops crisp edges and works for breakfast or supper. A practical guide covering both dishes helps you choose between a tender, broth-based meal and a crisp, pan-cooked one.
Corned Beef and Cabbage
Corned beef is brisket cured in a seasoned brine, so it is already salted and flavored before it reaches the pot. For an even, tender result, place the brisket in a pot, cover it with water, and bring the liquid just to a simmer. Keep it at a gentle bubble rather than a rolling boil, which can make the meat tighten. A 3- to 4-pound piece often needs roughly 2½ to 3½ hours, but tenderness is a better guide than the clock.
Add vegetables in stages so they finish together instead of turning soft. If using potatoes and carrots, add them during the final 30 to 40 minutes of simmering; cut larger potatoes into even pieces so they cook at a similar pace. Add cabbage wedges for the final 15 to 20 minutes, keeping them large enough to hold their shape. The timing can vary with the size of the brisket and vegetables, so check that a fork passes easily through the meat and potatoes.
Lift out the brisket and let it settle briefly before slicing thinly across the grain. Arrange slices with cabbage, carrots, and potatoes, then moisten the plate with a little cooking liquid. Mustard is a common accompaniment, and some cooks serve the broth separately in a small bowl. This approach gives you a complete meal from one pot, with the meat sliced for serving and the vegetables kept distinct rather than mixed into the broth.
Corned Beef Hash
Corned beef hash uses cooked corned beef, making it a separate preparation from the simmered cabbage meal. Dice the meat and cooked potatoes into roughly ½-inch pieces; similar sizing helps them brown at about the same rate. A small amount of finely chopped onion is optional, adding sweetness as it softens in the pan. Cold leftover potatoes work well because they hold their shape when stirred, while freshly cooked potatoes should be drained and allowed to release excess steam first.
Warm a wide skillet over medium heat with a thin layer of butter, oil, or a combination. Add the onion first if using it, cook until softened, then fold in the beef and potatoes. Spread the mixture into an even layer and leave it undisturbed for several minutes so the underside develops a browned crust. Turn it in sections rather than stirring constantly; frequent movement breaks up the pieces and prevents a crisp surface from forming.
Manage moisture by avoiding a crowded pan and draining wet potatoes before they go in. If the mixture releases liquid, let it cook uncovered until the moisture evaporates, then give it time to brown. Serve the hash hot as its own skillet dish, plain or topped with a fried egg; it does not need cabbage or cooking broth to make it complete. The guide to both dishes distinguishes the gently simmered brisket-and-vegetable meal from hash, where diced leftovers become a browned, crisp-edged skillet supper.
Cooking Beef Brisket
Brisket cooking hinges on giving a collagen-rich cut enough time to become tender without drying its leaner sections. Braising surrounds the meat with moist heat, while smoking cooks it with circulating heat and wood smoke. A smoker commonly runs at 225–275°F; a covered oven braise often cooks near 300°F. In either method, texture—not a fixed number of hours—is the useful measure of when the brisket is ready.
Why Brisket Needs Careful Cooking
Brisket comes from the lower chest, a muscle group that supports much of the animal’s weight and works hard. Its muscle fibers contain substantial connective tissue, including collagen, so a brief, high-heat cook can leave the meat firm and chewy. Sustained heat gradually converts collagen into gelatin, giving properly cooked brisket its soft, succulent texture. The challenge is to allow that change to happen while managing the leaner parts of the cut, which can lose moisture if exposed to excessive heat for too long.
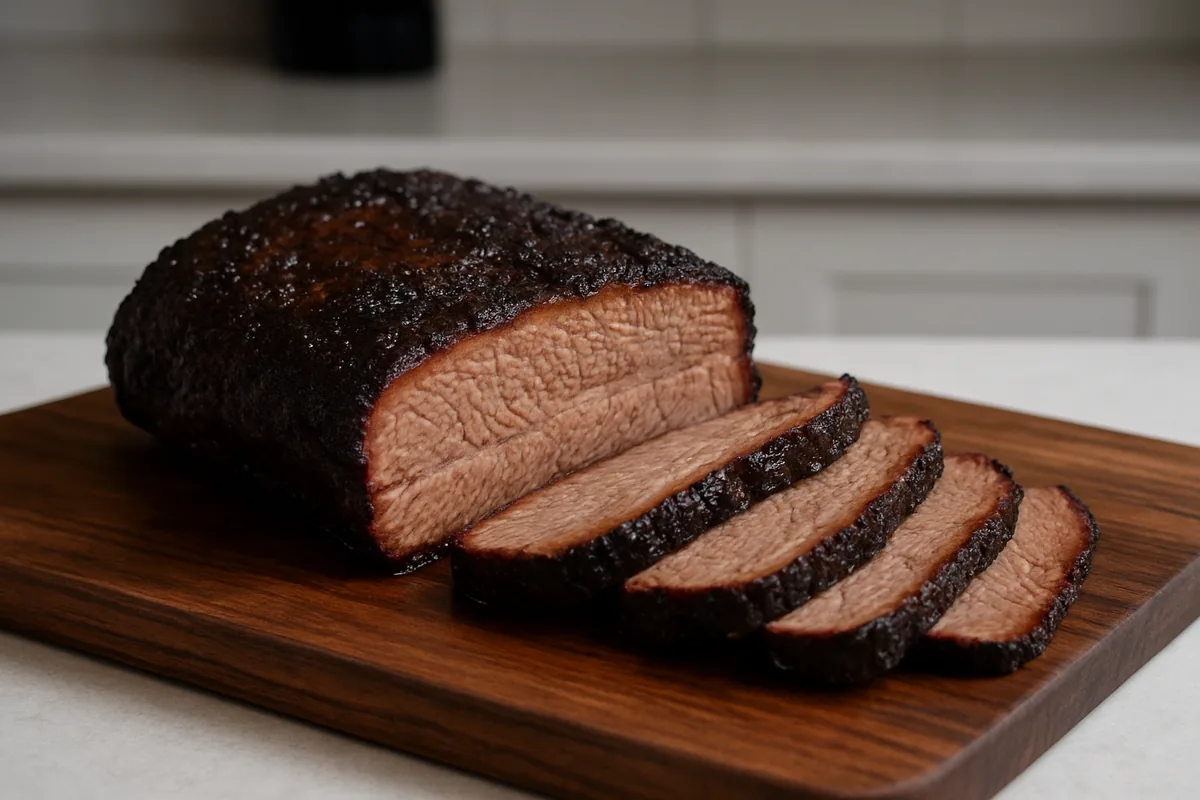
Smoking is a dry-heat option: the brisket cooks in a smoker at roughly 225–275°F, where steady airflow and smoke build a dark exterior as the interior slowly softens. Cooking may take many hours, but the exact duration varies with the brisket’s size, thickness, starting temperature, and the smoker’s stability. A stall, when evaporation temporarily slows the rise in internal temperature, can also extend the cook. Wrapping the meat partway through is one way cooks limit evaporation, though it softens the bark.
Braising uses a covered pot or roasting pan and a modest amount of liquid, with the oven commonly set near 300°F. The enclosed, humid environment helps the connective tissue soften without requiring smoke or a long exposure to dry air. Either approach can work well: smoking suits a smoky crust, while braising gives a moist cooking environment and flavorful liquid. Choose a steady, moderate method and allow enough time for the brisket to become tender.
Check Tenderness and Rest
Use tenderness checks rather than the clock alone, because two briskets cooked at the same temperature can finish at different times. In barbecue, an internal temperature around 195–205°F is a common range for checking, not a guarantee of doneness. Insert a thin skewer or thermometer probe into several thick areas: it should slide in with little resistance, rather than meeting a tight or rubbery feel. If it still resists, continue cooking and check again after a short interval.
Once tender, rest the brisket for about 30–60 minutes before slicing. Resting gives the temperature time to even out and makes the meat easier to handle; keep it loosely covered rather than trapping steam against the crust. Cut across the grain into slices about ¼ inch thick to shorten the muscle fibers and make each bite easier to chew. On a whole brisket, the flat and point can have different grain directions, so check the fibers again when moving from one part to the other. The brisket technique guide explains the cooking process in more detail; the practical final test remains a probe that meets little resistance.
Beef Ribs and Short Ribs Compared
Beef back ribs and short ribs come from different parts of the carcass, so their shape, meat coverage, and cooking needs differ. Back ribs are the curved bones left after the rib roast is removed, while short ribs are cut from areas such as the plate or chuck. Those differences affect how much meat sits on each bone and how readily the cut suits quick grilling or a longer braise. The comparison below covers cut location, structure, portion formats, and the cooking and serving uses most commonly associated with each type.
Cut, Shape, and Structure
Both cuts contain rib bones, but a rack of back ribs and a short-rib portion are not interchangeable. The table compares their typical butcher formats and shows how bone shape and meat distribution influence cooking.
| Feature | Beef back ribs | Short ribs |
|---|---|---|
| Cut location | From the dorsal rib section, commonly left after ribeye steaks or a rib roast are removed. | Usually from the plate or chuck; the exact source depends on the butcher’s cut. |
| Bone and meat shape | Long, curved bones, often sold as a rack of about 7 bones; relatively little meat may remain directly on top, with more between the bones. | Shorter, thicker bone-in pieces, often sold as individual bones or blocks; substantial meat commonly sits above the bone. |
| Connective tissue and fat | Often less meaty than short ribs, with connective tissue between the bones and a comparatively leaner eating portion. | Typically well-marbled and rich in connective tissue, especially in chuck or plate cuts; collagen softens with prolonged moist cooking. |
| Typical portion format | A whole rack or smaller sections of 2–4 bones; racks are often shared rather than served as a single large steak-like portion. | Commonly sold as 1–2 bone portions for braising, or sliced thinly across several bones for flanken-style grilling. |
| Cooking implication | The curved rack cooks as a connected piece, so indirect heat and steady cooking help warm the meat around the bones without scorching the exposed surfaces. | The thick meat needs time for connective tissue to soften; thickness and whether the ribs are English-cut or thinly cross-cut change the method and timing. |
Names can vary between butchers, so the visible cut matters: a rack of curved bones with meat between them is characteristic of back ribs, while thick, meaty blocks are typical short ribs. A thin cross-cut short rib is a distinct format, not a miniature back-rib rack.
Cooking and Serving Uses
Back ribs suit barbecue cooking over indirect heat because the rack can be cooked whole and turned or repositioned as needed. At roughly 250–275°F (120–135°C), a rack commonly takes about 4–6 hours; actual timing varies with rack size, grill stability, and how much meat remains. The thinner meat between the bones makes close attention to heat more useful than applying a fixed time alone.
Thick English-cut short ribs are better suited to braising: brown them, add a modest amount of liquid, cover the pot, and cook at about 300°F (150°C) for roughly 2½–3½ hours, until fork-tender. Their greater thickness slows heat reaching the center, while the moist environment gives connective tissue time to soften. Thin flanken-cut short ribs cook much faster; over high grill heat, pieces around ½ inch thick may need only about 1–2 minutes per side.
Back ribs are commonly served as a shared rack with barbecue-style sides; braised short ribs work as a plated main with mashed potatoes or polenta, while flanken cuts can be served in smaller grilled portions. The cut-and-shape comparison explains why timing cannot be transferred from one rib type to the other. For a meaty, fork-tender main, choose thick short ribs and braise them; for a rack made to share and cook over indirect heat, choose back ribs.
Slow-Cooking Cuts and Beef Tallow
Slow cooking suits beef cuts with substantial connective tissue, which becomes tender during prolonged moist heat. Chuck, brisket, and shank are common choices, but their shape and the intended dish affect what to buy. A cut for evenly sized stew pieces has different practical requirements from a single roast or a braise with bones. The slow-cooking cut guide explains selection criteria in more detail, including how structure and size fit the cooking method. Beef tallow is a separate food ingredient: it is rendered fat, not a cut of meat, and a dedicated explanation covers its definition and uses.
Select Cuts for Slow Cooking
Chuck, brisket, and shank contain collagen-rich connective tissue that can feel firm when quickly cooked but soften during hours of moist heat. As the meat cooks, collagen gradually converts to gelatin, giving braises and stews a succulent texture and body. Choose these cuts for dishes with enough time for that change: an oven braise commonly runs at 275–325°F, while a large piece may need several hours before it yields easily. Lean, naturally tender steaks are usually better suited to faster methods than to a long simmer.
Assess structure and size as well as the cut name. For stew, look for pieces that can be cut into roughly uniform 1½–2-inch chunks so they cook at a similar rate; chuck is a practical choice because its seams of connective tissue and fat help keep the pieces moist. For a whole braise, choose a compact piece that fits the pot with room for liquid and a tight-fitting lid. Shank, often sold in cross-cut portions, brings connective tissue and a central bone; consider whether the dish benefits from bone-in portions or needs boneless meat for serving. Brisket is sold in larger sections, so the cooking vessel and number of diners matter when choosing its size.
Match the amount of connective tissue to the cooking time and finished texture you want. The dedicated slow-cooking cut guide compares these selection factors and explains which sizes and structures suit different dishes.
What Beef Tallow Is
Beef tallow is beef fat that has been slowly rendered until the fat separates from water and solid tissue, then strained. Raw beef fat is still intact adipose tissue; it has not been rendered and may contain moisture and connective material. Pan drippings are different again: they combine melted fat with meat juices, water, and browned particles, so they are not a uniform cooking fat.
In cooking, clean tallow can be used to fry potatoes, sear ingredients, roast vegetables, or add beef flavor to a dish. Its usefulness depends on how thoroughly it was rendered and strained: leftover moisture or solids can shorten its keeping quality and affect its behavior in a hot pan. Store it in a clean, dry, airtight container in the refrigerator, and freeze it for longer storage; use it sooner if it develops an unpleasant or rancid smell. A dedicated explanation of beef tallow covers its definition, rendering, and food uses in greater detail. For a slow-cooked dish, select the cut for its structure and cooking time; use tallow as rendered fat, not as a substitute for the meat.
Wagyu and Other Beef Compared
Wagyu is often associated with richly marbled beef, but the name alone does not specify where an animal was raised or how its meat was graded. Origin, breed, production standards, and the particular cut all affect what a buyer can expect. Marbling is a useful clue to richness and cooking behavior, not a guarantee that every Wagyu steak will taste or cook alike. Comparing those details with the characteristics of conventional beef makes the label more informative. The practical comparison is between specific products and cuts, rather than between two fixed kinds of beef.
Terminology and Marbling
Wagyu means Japanese cattle and refers to four native Japanese breeds: Japanese Black, Japanese Brown, Japanese Shorthorn, and Japanese Polled. Japanese Black is the breed most commonly associated with highly marbled beef. Outside Japan, Wagyu may refer to beef from Japanese-raised cattle or to cattle with Wagyu ancestry raised in another country; crossbreeding and labeling practices vary by market. As a result, the word does not by itself establish an animal’s origin, breeding proportion, or grading standard.
Marbling is fat distributed within the muscle, visible as fine streaks or flecks in a cut surface. It differs from external fat, such as a fat cap along the edge, which can be trimmed away before cooking. Intramuscular fat softens and renders as the meat heats, contributing a lubricated texture and a richer mouthfeel. The amount and pattern vary between animals, muscles, and grades, so visible marbling is best read as one characteristic of a particular cut, not a complete description of it.
Japan uses a carcass grading system that combines a yield grade, from A to C, with a meat-quality grade from 1 to 5. The quality assessment includes marbling as well as meat color, firmness and texture, and fat quality; the Beef Marbling Standard runs from 1 to 12. A label such as A5 therefore describes a Japanese grading result, not a universal scale shared by beef producers worldwide. Beef from other countries may use different grading systems, and the same grade name should not be assumed to mean identical marbling or eating qualities.
Flavor and Cooking Differences
Greater marbling usually makes beef taste richer and feel more tender and moist, while leaner cuts tend to have a cleaner, less fatty finish. Those are broad tendencies, not guarantees: breed, feed, aging, muscle, and handling also shape flavor and texture. Wagyu from different countries and production systems can range from moderately marbled to exceptionally rich, so a comparison should identify origin, grading system, and cut instead of treating all Wagyu as one style.
Because richly marbled beef can feel substantial, a smaller portion may be satisfying; thin slices or modest steak portions let its richness remain balanced. In a pan, render some of the surface fat over moderate to medium-high heat and watch closely as it browns. On a grill, dripping fat can cause flare-ups, so use a cooler zone to move the meat away from direct flames if needed. A lean steak generally benefits from a little more attention to prevent a dry, firm result, while extra marbling provides more cushion against moisture loss but does not make overcooking harmless.
For a practical Wagyu comparison, assess the stated origin, marbling level, cut, and intended portion together. A highly marbled steak suits a brief sear and restrained seasoning, whereas a less marbled Wagyu cut may cook more like conventional beef of the same cut. These distinctions are more useful than assuming a single cooking time or heat level applies to every product carrying the Wagyu name.